


Preventing flare-ups and grease buildup in your bbq grill is essential for safe cooking, consistent heat distribution, and prolonging the lifespan of your equipment. Flare-ups occur when accumulated grease ignites, causing sudden flames that can char food, create uneven cooking temperatures, and even pose safety hazards. Understanding the key maintenance steps to control grease and prevent these dangerous flare-ups transforms your grilling experience from frustrating to enjoyable, while protecting your investment in quality outdoor cooking equipment.
Grease buildup is the primary culprit behind most bbq grill performance issues, including unpredictable temperature spikes, excessive smoke production, and compromised food flavor. Every time you grill fatty meats, drippings fall onto heat deflectors, burners, and collection trays, where they carbonize over time and create layers of residue. This article outlines comprehensive maintenance protocols specifically designed to eliminate grease accumulation and prevent flare-ups, covering pre-cooking preparation, post-cooking cleanup, deep cleaning schedules, and component-specific care strategies that address the root causes of these common grilling problems.
Understanding How Grease Buildup Causes Flare-Ups
The Combustion Cycle in Your BBQ Grill
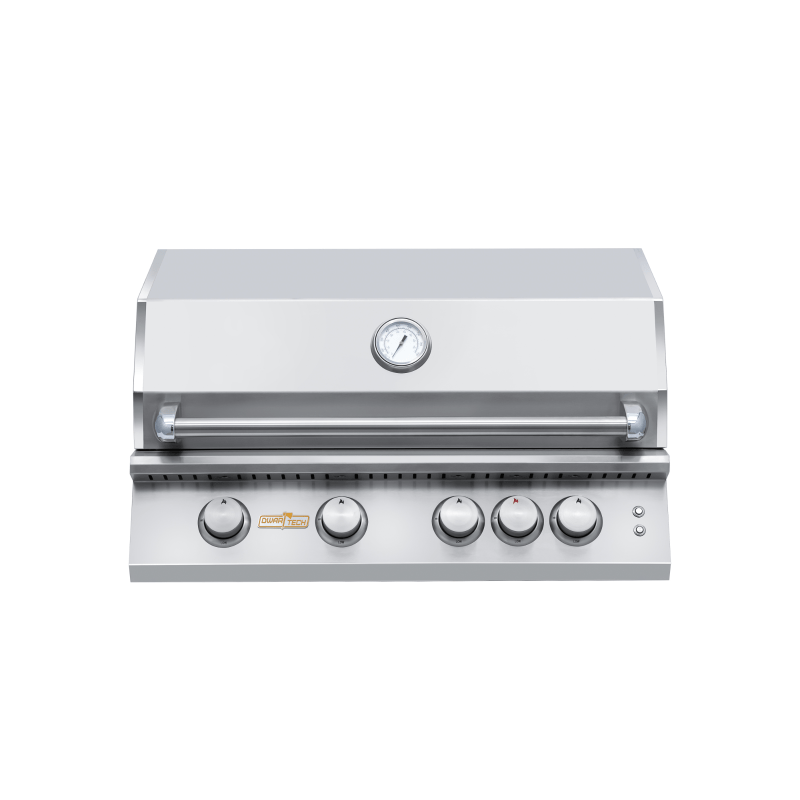
When you cook fatty foods on your bbq grill, rendered fat drips down onto hot surfaces below the cooking grates. These drippings initially vaporize, creating smoke that adds flavor to your food. However, when grease accumulates on heat deflectors, flavorizer bars, or directly on burners, it creates fuel deposits that ignite when temperatures exceed their flash point, typically around 600 degrees Fahrenheit. The sudden combustion produces flames that shoot upward through the grates, causing the characteristic flare-up that blackens food and creates acrid smoke.
Repeated cooking sessions without proper cleanup compound this problem exponentially. Each grilling session adds another layer of carbonized fat to existing deposits, creating thicker accumulations that are increasingly difficult to remove. These residue layers also reduce heat efficiency by insulating burners and heat deflectors, forcing your bbq grill to work harder to maintain target temperatures. The combination of reduced efficiency and increased flammable material creates a dangerous cycle where flare-ups become more frequent and more intense over time.
Specific Grease Accumulation Zones
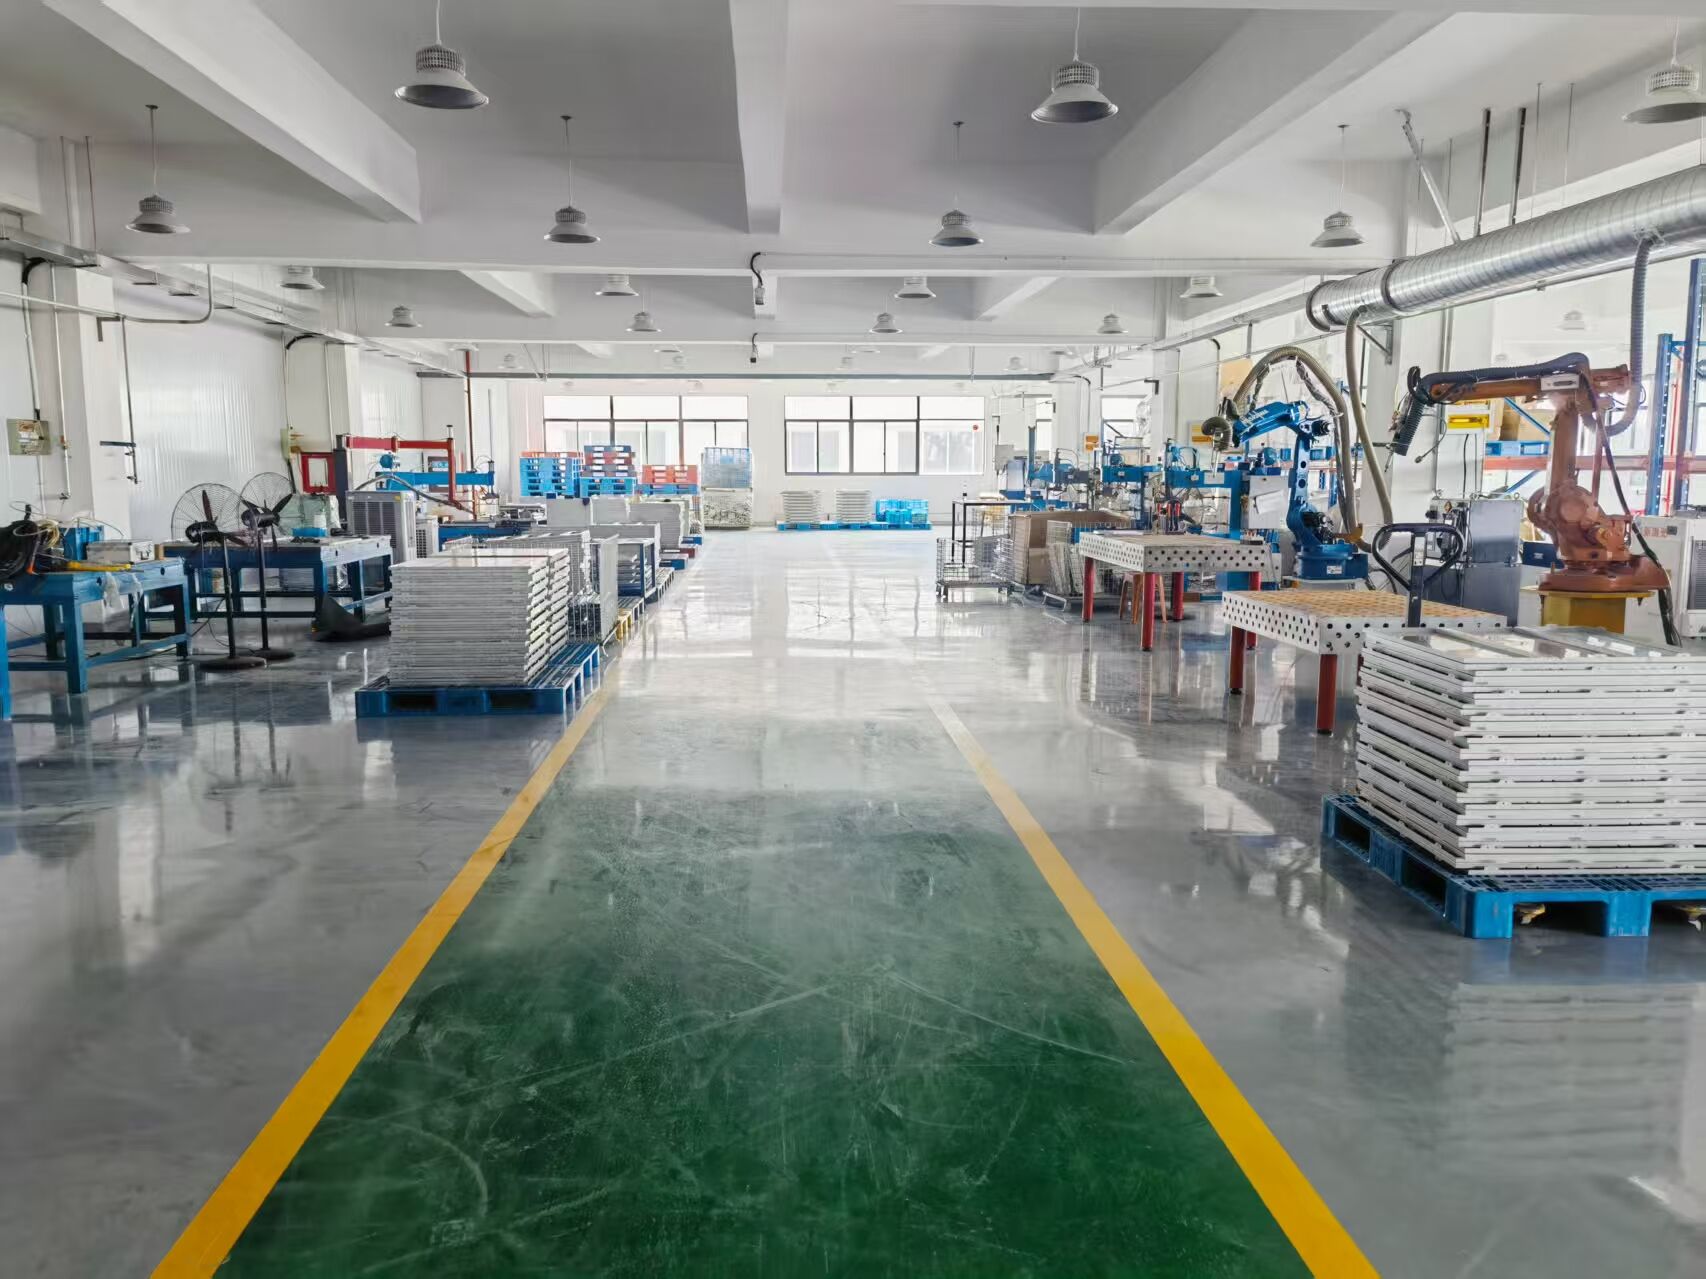
Different areas of your bbq grill accumulate grease at varying rates depending on their position and function. The drip tray or grease collection pan receives the highest volume of liquid fat and requires the most frequent attention. Heat deflectors or flavorizer bars positioned directly above burners catch substantial grease that vaporizes and carbonizes rapidly due to direct heat exposure. The interior walls of the grill hood also accumulate vaporized grease that condenses on cooler surfaces, creating sticky residue that eventually drips back down onto cooking surfaces.
Burner tubes themselves can become coated with grease, particularly around ports where flames emerge. This coating not only reduces flame efficiency but also creates ignition points for flare-ups when grease drips directly onto hot burner surfaces. Even cooking grates accumulate carbonized food particles and grease between the bars, which can ignite during high-heat cooking. Recognizing these specific accumulation zones allows you to target your maintenance efforts effectively and prevent flare-ups before they occur during your next grilling session.
Essential Pre-Cooking Maintenance Steps
Grease Trap Inspection and Emptying
Before every grilling session, inspect your bbq grill grease trap or drip pan to assess accumulated fat levels. A full or nearly full grease trap dramatically increases flare-up risk because overflow can spill onto burners or create pooling beneath heat deflectors. Remove the grease trap completely and dispose of cooled grease according to local regulations, never pouring liquid fat down household drains. For easier removal, line your grease trap with aluminum foil before each use, allowing you to simply lift out the foil liner and dispose of collected grease without scrubbing the pan itself.
Clean the grease trap channel and surrounding area where the collection pan slides into position. Grease often accumulates along these tracks, creating sticky buildup that can ignite if it contacts hot surfaces during cooking. Use a putty knife or grill scraper to remove stubborn deposits, then wipe the area with paper towels dampened with warm soapy water. This simple pre-cooking check takes less than three minutes but significantly reduces flare-up potential by ensuring proper grease drainage away from heat sources throughout your cooking session.
Quick Grate and Heat Deflector Inspection
While preheating your bbq grill, visually inspect cooking grates for excessive carbonized buildup between bars. Heavy carbon deposits create rough surfaces where new grease accumulates more readily, increasing flare-up risk. If you notice significant buildup, extend your preheat time by five minutes to reach maximum temperature, then use a brass-bristle grill brush to scrape grates clean while they are still hot. The high heat loosens carbonized material, making removal easier and more thorough than brushing cold grates.
Lift cooking grates and examine heat deflectors or flavorizer bars for visible grease accumulation. These components should appear relatively clean with minimal wet or sticky residue. If you notice pooled grease or thick carbonized layers, abort your cooking plans temporarily and perform an emergency deep clean focusing on these critical components. Cooking with heavily soiled heat deflectors virtually guarantees flare-ups because the accumulated grease will ignite as soon as additional drippings contact the hot, fuel-laden surfaces during your cooking session.
Post-Cooking Cleanup Protocols
Immediate High-Heat Burnoff Procedure
Immediately after removing food from your bbq grill, close the lid and turn all burners to maximum heat for ten to fifteen minutes. This high-heat burnoff vaporizes fresh grease residue before it can cool and solidify into stubborn carbonized deposits. The intense heat converts liquid fat into ash that brushes away easily rather than sticky residue that requires aggressive scraping. This single step eliminates approximately seventy percent of potential grease buildup if performed consistently after every cooking session.
During the burnoff period, monitor your bbq grill for excessive smoke or flames visible through the hood vents. Some smoke is normal and expected as residual grease vaporizes, but heavy black smoke or visible flames indicate excessive grease accumulation that requires additional attention. After the burnoff cycle completes, turn off all burners and allow the grill to cool for five minutes before brushing. The grates should still be hot enough that carbonized material brushes away easily but cool enough to handle safely with heat-resistant gloves.
Grate Brushing and Debris Removal
Once the burnoff cycle completes, use a high-quality brass-bristle or stainless-steel grill brush to thoroughly scrub all cooking grate surfaces. Brush in the direction of the grate bars rather than perpendicular to them, ensuring bristles reach between bars where grease and food particles lodge. Focus extra attention on areas directly above burners where the highest heat concentrations occur, as these zones accumulate the most stubborn carbonized deposits. Make at least three complete passes across the entire grate surface to ensure thorough cleaning.
After brushing, use a damp cloth or wadded paper towels held with long tongs to wipe grate surfaces and collect loosened debris. This step removes ash and carbon particles that brushing dislodges but doesn't eliminate, preventing these particles from contaminating your next meal. For gas bbq grill models, also brush around burner controls and the interior hood surfaces within arm's reach. These often-neglected areas accumulate grease vapor that eventually drips back onto cooking surfaces, contributing to flare-up risk during subsequent grilling sessions.
Weekly Deep Cleaning Requirements
Complete Heat Deflector and Flavorizer Bar Cleaning
Once weekly, or after every four to five cooking sessions, perform a thorough cleaning of your bbq grill heat deflectors, flavorizer bars, or ceramic briquettes depending on your model configuration. Remove these components completely from the grill and inspect both sides for grease accumulation. Use a putty knife or dedicated grill scraper to remove thick carbonized deposits, working over a garbage bag or newspaper to contain debris. For stubborn buildup, soak components in hot soapy water for thirty minutes to soften residue before scraping.
After mechanical cleaning, scrub heat deflectors with a wire brush and rinse thoroughly with a garden hose or in a utility sink. Allow components to dry completely before reinstalling them in your bbq grill to prevent rust formation on metal surfaces. Inspect for signs of deterioration such as warping, excessive rust, or cracks that compromise function. Damaged heat deflectors don't distribute heat evenly and may allow grease to drip directly onto burners, significantly increasing flare-up potential regardless of how clean you maintain other grill components.
Burner Tube Inspection and Port Cleaning
Examine burner tubes for grease accumulation around flame ports and along tube surfaces. Clogged ports reduce flame output and create uneven heating, while grease-coated tubes can ignite and cause sustained flare-ups that are difficult to control. Use a straightened paperclip, pipe cleaner, or dedicated port cleaning tool to clear each burner port individually, ensuring unrestricted gas flow. Work carefully to avoid enlarging ports, which would create oversized flames and increase fuel consumption.
Remove burner tubes according to manufacturer instructions if heavy grease coating is visible on exterior surfaces. Wash tubes in warm soapy water and use a bottle brush to clean the interior if your bbq grill model features removable burners. Inspect for rust, corrosion, or holes that indicate burner replacement is necessary. Damaged burners not only perform poorly but also create safety hazards through improper combustion and unpredictable flame patterns that exacerbate grease ignition problems during normal cooking operations.
Interior Cabinet and Grease Channel Maintenance
Open your bbq grill cabinet or cart doors and inspect the interior surfaces where the grease trap slides into position. These enclosed spaces accumulate grease vapor and drippings that escape the collection system, creating fire hazards if allowed to build up over time. Use a putty knife to scrape heavy deposits from the floor of the cabinet, then wipe surfaces with degreasing cleaner or warm soapy water. Pay particular attention to corners and seams where liquid grease pools and hardens into stubborn residue.
Trace the grease channel from beneath the heat deflectors to the collection tray, removing any obstacles or buildup that impedes proper drainage. Some bbq grill models feature a sloped channel or tube that directs grease away from burners; ensure this pathway remains clear and properly angled for gravity drainage. Blocked grease channels cause fat to pool beneath cooking surfaces where it can ignite during high-heat cooking, defeating all other maintenance efforts you invest in preventing flare-ups and maintaining safe grilling conditions.
Monthly Comprehensive Deep Clean Procedures
Complete Grill Disassembly and Component Soaking
Once monthly, schedule a comprehensive deep clean that involves complete bbq grill disassembly. Remove cooking grates, heat deflectors, burner tubes, and any other removable components according to your owner's manual. Prepare a large container or use a utility sink filled with hot water and a heavy-duty degreasing solution specifically formulated for grill cleaning. Submerge all removable components and allow them to soak for at least one hour, or overnight for heavily soiled parts.
While components soak, scrape and clean the interior surfaces of your bbq grill firebox, the underside of the hood, and all areas normally hidden by cooking surfaces. Use a shop vacuum with a hose attachment to remove ash, carbon particles, and loose debris from corners and crevices. This thorough cleaning eliminates accumulated residue that daily and weekly maintenance routines cannot reach, resetting your grill to nearly new condition and preventing the gradual buildup that eventually causes chronic flare-up problems despite regular surface cleaning efforts.
Hood Interior and Exterior Detailing
The interior hood surface of your bbq grill accumulates vaporized grease that condenses on cooler metal surfaces, creating a sticky coating that eventually carbonizes and can drip onto food or ignite during high-heat cooking. Scrape heavy deposits from the hood interior using a putty knife, working carefully to avoid damaging any built-in thermometers or hood-mounted features. Wipe surfaces with a degreasing cleaner and a non-abrasive sponge, rinsing with clean water to remove all chemical residue.
Clean the exterior hood surfaces and control panel area to maintain your bbq grill appearance and identify any maintenance issues such as rust spots, loose hardware, or damaged components. Use stainless steel cleaner for stainless exterior surfaces, following the grain direction to avoid scratching. This attention to exterior maintenance not only preserves your grill's appearance but also allows you to notice problems like grease leaking from seams or damaged gaskets that could contribute to flare-up issues by allowing grease to escape the proper drainage pathway.
Preventive Strategies to Minimize Grease Accumulation
Strategic Cooking Zone Management
Reduce grease accumulation and flare-up frequency by implementing strategic cooking zone techniques on your bbq grill. When grilling particularly fatty meats like chicken thighs, pork shoulder, or marbled steaks, use indirect heat cooking methods that position food away from direct burner flames. Light only the outer burners on a multi-burner bbq grill and place fatty foods in the center zone where drippings fall onto cooler surfaces that don't immediately vaporize grease, reducing smoke and flare-up intensity.
For direct heat cooking of fatty proteins, trim excess visible fat before grilling to minimize dripping volume. Consider partially precooking fatty items like chicken wings in an oven to render out some fat before finishing them on the bbq grill for char marks and smoky flavor. These cooking technique modifications don't compromise food quality but dramatically reduce the volume of grease your grill must manage during each session, extending time between deep cleaning requirements and reducing chronic flare-up problems.
Drip Pan Liners and Grease Management Accessories
Install disposable aluminum drip pan liners in your bbq grill grease tray to simplify cleanup and ensure regular grease removal. These inexpensive liners allow you to remove and dispose of collected grease without scrubbing the permanent collection pan, eliminating the temptation to skip this critical maintenance step due to inconvenience. Replace liners after every grilling session or when they reach half capacity, whichever comes first, to maintain proper grease management throughout the cooking season.
Consider adding aftermarket grease management accessories like drip pans positioned beneath specific cooking zones or grease splash guards that redirect drippings toward collection channels. Some bbq grill enthusiasts place a disposable aluminum pan filled with water beneath fatty meats during indirect cooking, catching drippings in liquid that doesn't ignite and simplifying post-cooking cleanup. These proactive accessories work in conjunction with regular maintenance rather than replacing it, creating multiple barriers against grease accumulation and flare-up formation.
Seasonal Storage and Off-Season Maintenance
Before storing your bbq grill for extended periods, perform a comprehensive deep clean even if you recently completed monthly maintenance. Grease residue left on grill components during storage can harden into extremely stubborn deposits that resist removal when you recommission the grill next season. Coat clean cooking grates with a thin layer of cooking oil to prevent rust formation, but ensure all other surfaces are completely grease-free before covering or storing your grill to avoid attracting pests and preventing oxidation damage.
If you store your bbq grill outdoors under a cover, inspect it periodically during the off-season for moisture accumulation, pest intrusion, or cover damage that exposes components to weather. Moisture trapped beneath grill covers accelerates rust formation and can cause mold growth on grease residue, creating health hazards and component damage that compromise performance when you resume cooking. A mid-storage inspection allows you to address these issues before they become serious problems requiring component replacement or extensive remediation work.
FAQ
How often should I empty the grease trap on my bbq grill?
Empty your bbq grill grease trap after every cooking session or whenever it reaches approximately half capacity, whichever comes first. Allowing grease to accumulate beyond this point increases overflow risk and creates conditions where pooled fat can ignite, causing flare-ups. For frequent grillers who cook multiple times per week, checking and emptying the grease trap should become part of your post-cooking routine. If you grill particularly fatty foods like chicken thighs or pork ribs, inspect the trap mid-cooking session during long cooks to ensure it hasn't filled unexpectedly. Using disposable aluminum liners makes this frequent maintenance task quick and mess-free, eliminating the most common excuse for skipping this critical flare-up prevention step.
Can I use oven cleaner on my bbq grill components?
Avoid using conventional oven cleaner on most bbq grill components, as these harsh alkaline chemicals can damage protective coatings, discolor metal surfaces, and leave residues that produce toxic fumes when reheated during cooking. Instead, use degreasers specifically formulated for grill cleaning or create a natural cleaning solution using baking soda and water paste for gentle scrubbing action. For extremely stubborn grease buildup, hot water soaking combined with mechanical scraping provides effective cleaning without chemical risks. If you choose to use commercial cleaners, select products explicitly labeled as safe for outdoor cooking equipment and follow all safety instructions regarding rinsing and neutralization before returning components to your bbq grill.
What causes flare-ups even after cleaning my bbq grill?
Persistent flare-ups despite regular cleaning typically indicate one of several underlying issues beyond simple grease accumulation. Damaged or warped heat deflectors may no longer properly shield burners from drippings, allowing grease to contact flames directly regardless of cleanliness. Clogged burner ports create uneven flame distribution with concentrated hot spots that ignite drippings more readily. Alternatively, you may be cleaning visible surfaces while missing hidden grease accumulation in drainage channels, around burner mounting brackets, or in corners where debris collects. Inspect your entire bbq grill system methodically, focusing on areas you typically don't access during routine cleaning. Consider the types of foods you cook; even with perfect maintenance, extremely fatty meats will produce some flare-ups that require active management through indirect cooking techniques and attentive monitoring during the grilling process.
Is it necessary to remove burners for cleaning?
Remove burners for thorough cleaning every three to four months or whenever you notice uneven flames, yellow flame coloration instead of blue, or excessive grease coating visible on burner surfaces. While you can maintain adequate performance with regular surface cleaning between removals, periodic burner removal allows you to inspect for rust, clear all flame ports thoroughly, and clean the interior and underside where grease accumulates out of sight. This deeper maintenance prevents the gradual performance degradation that occurs when partially clogged burners operate inefficiently, creating hot spots that contribute to flare-up problems. Always consult your bbq grill owner's manual for model-specific burner removal procedures, as improper removal or installation can damage gas connections and create dangerous situations requiring professional repair before you can safely operate your grill again.